

Labeling Tool
The Labeling Tool allows users to draw bounding boxes for objects of interest (for example, cells or spheroids/organoids). These bounding boxes can then be saved and fed into Ramona’s machine learning model training to optimize object detection and segmentation tools for users. This tool is used to label two dimensional images. Three dimensional datasets should be projected to one two dimensional slice to ensure images are in focus before using this tool.
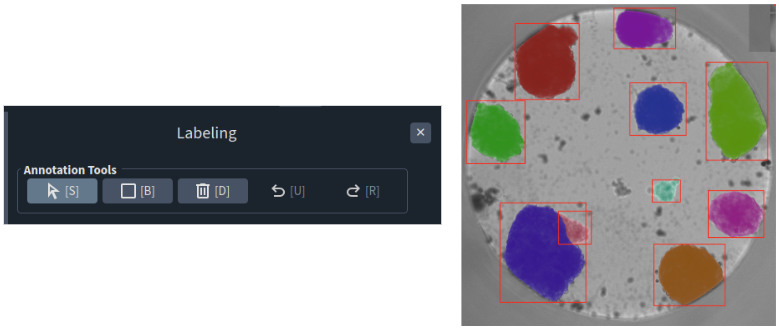
Step |
Function |
|---|---|
1 |
Open an acquired dataset in the MCAM™ Viewersoftware. |
2 |
Navigate to Tools > Labeling. A panel will open on the right. |
3 |
Click on [B] under Annotation Tools. Navigate to an object of interest, then click, hold, and drag. You will see a box with an orange-dotted line (i.e. bounding box) appear with a colored mask overlay dynamically covering the object while you adjust the bounding box. Make sure your object of interest is completely inside the bounding box before releasing the hold, and that the mask covers the object of interest (see figure below on how to correctly draw a bounding box). |
4 |
(Optional) To delete a bounding box, click on [D] under Annotation Tools. Move your cursor to the bounding box to be deleted. The bounding box changes from red to yellow. The bounding box is deleted after clicking on it. |
5 |
Repeat step 3 until all objects of interest are inside their respective bounding boxes. Click on [S] to pan around the screen when needed. |
6 |
Click “Save Changes” to save the bounding boxes. |
7 |
The results are saved in a folder named “segmentation_analysis_results” in the provided dataset’s folder with the metadata for the bounding boxes and a png file showing masks on the objects within bounding boxes. |
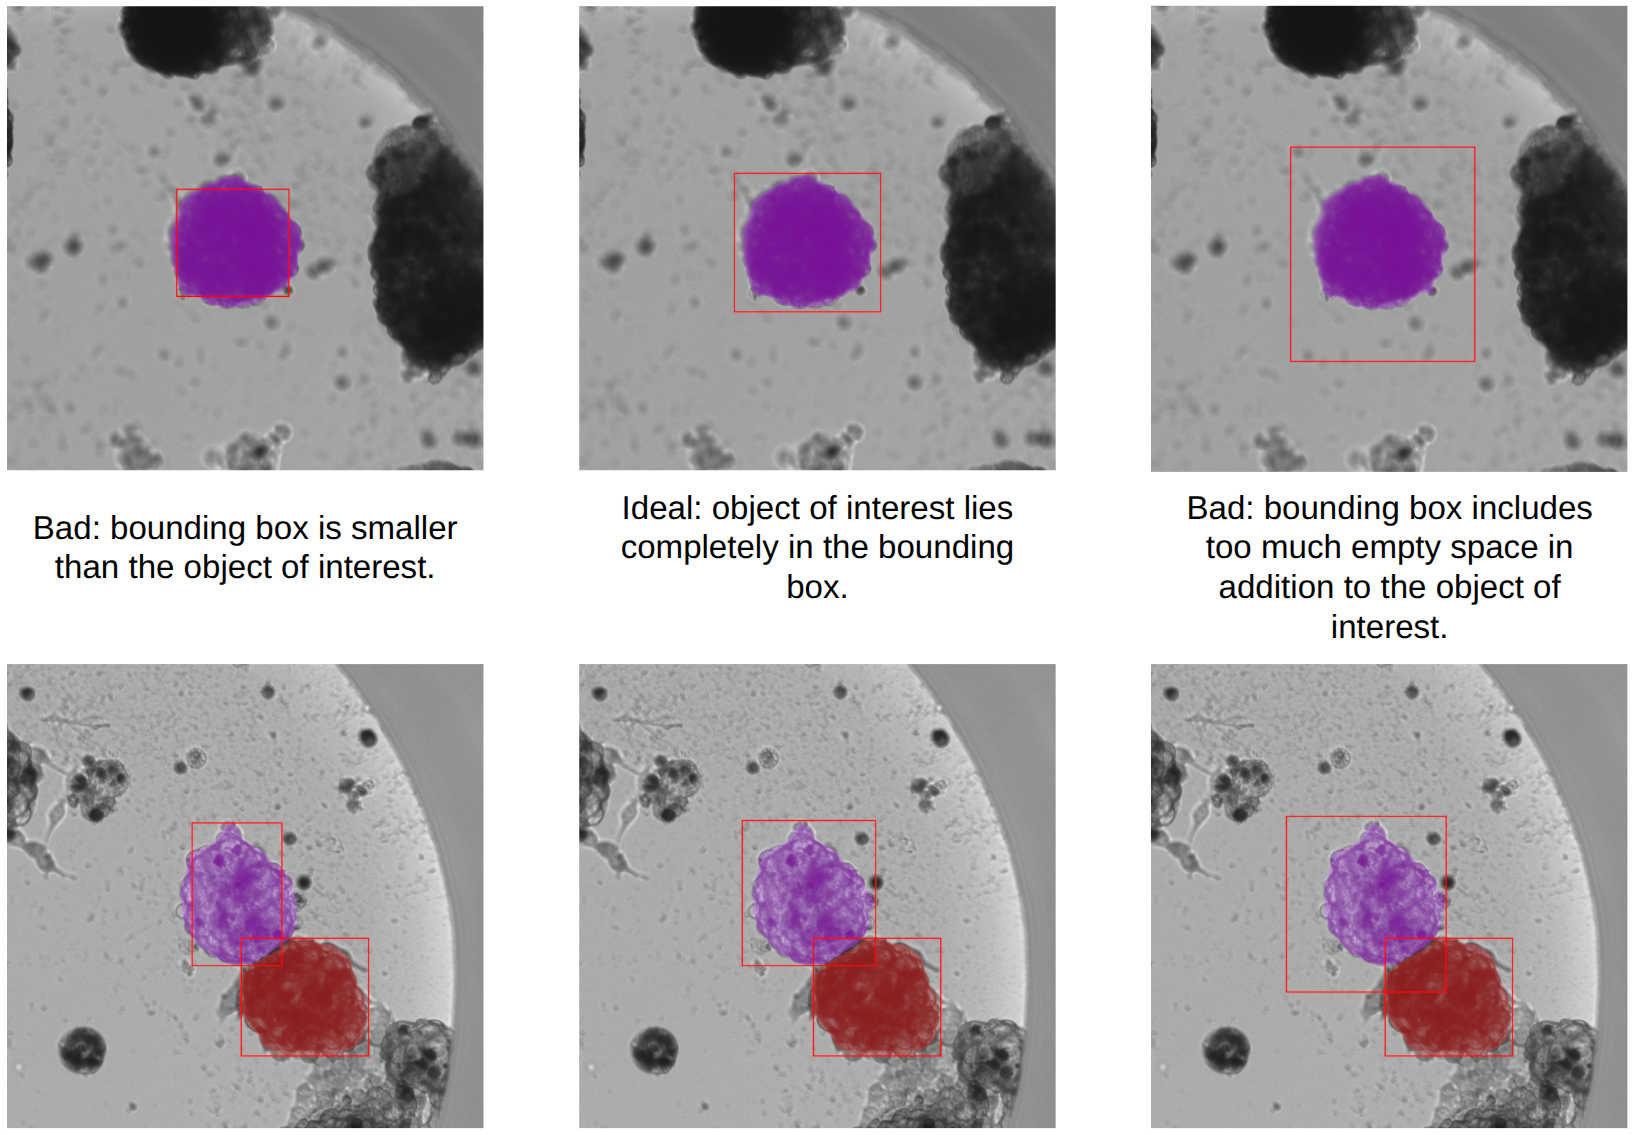
How to draw bounding boxes correctly around objects of interest (legends in the middle apply to figures above and below).