

Acquire an XYZ Stack
In Screening Mode with a 96-well plate it is often useful to acquire a z-stack at high resolution, however because the optical head views twenty four of ninety six wells at a time, the head needs to step between four x, y locations to acquire images of all ninety six wells. Using an XYZ stack, movement of the X, Y and Z stages are synchronized with image acquisition to capture volumetric scans.
Step |
Function |
|---|---|
1 |
Open the MCAM software. |
2 |
Ensure that “Well A1” is visible in the top left corner of the imaging window. Use the X and Y stage controls in the left panel to center Well A1 in this camera view. It can be helpful to unstitch the camera views to view just the top left corner and center this well within the camera view. Unstitch views by selecting Advanced>Stitch Image. |
3 |
Go to Assays > Acquire XYZ Stack. |
4 |
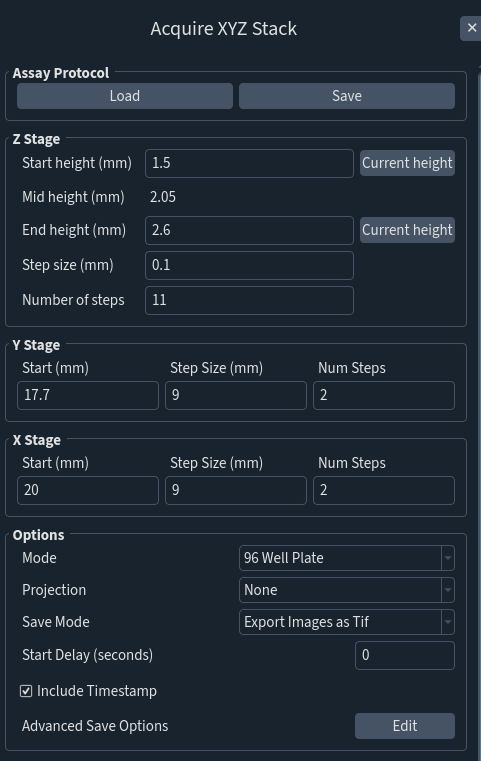
Enter a “Start height” and “End height” representing z-stage positions where the z-stack will start and stop. Sometimes it works well to find an optimal focal plane and choose this as the “Mid height” and then set the Start and End a millimeter below and above respectively. |
5 |
Enter either “Step size” or “Number of Steps” to determine the z-axis resolution. The second of these two parameters will update automatically. |
6 |
Y and X Stage parameters are populated automatically. Step size defaults to 9mm so that the optical head can move correctly to view all wells of a 96-well plate. |
7 |
Select other options as needed regarding projection type, delays, and save mode. Please see the MCAM User Manual for more information regarding these options. |
8 |
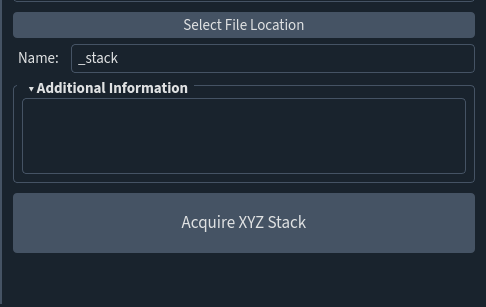
Select a File Location. Always select a folder on the “MCAM_data” drive to store data from MCAM acquisitions. The “File Location” will be displayed in the panel once defined. |
9 |
Enter a Name for the acquisition. A timestamp will automatically be appended to the selected name. |
10 |
Adjust imaging settings in the left side panel to optimize image quality. |
11 |
Click Acquire XYZ Stack to initiate the acquisition. |